
How To Clean The Interior Of Your Car In 3 Simple Steps - The Complete 2022 Guide [With Pictures]

In this guide, I’ll teach you how to clean the interior of your car in 3 simple steps, and get professional results in minimum time.
You'll also learn how to make the maximum impact with the least amount of effort. This is a concept I apply in all areas of my life, and it has saved me a great deal of trouble over the years.
In short, this is what you’re going to learn about:
Let’s dive right in…
What is the best way to clean the interior of your car?
I’m not going to lie to you. Properly cleaning a car is a lot of work, and most people avoid it like the plague. (That is why my service – Clean My Car – is in such a high demand).
But, through a lot of trial and error, I have found a way to make considerably easier, while still achieving the results you wanted in the first place, if not better.
And I’m going to share here with you what I’ve learned the hard way in over 10 years of cleaning cars professionally.
And the best part?
I’ll literally show you the exact system I use in my business on a daily basis.
[Watch the video below for a sneak peak]
You don’t have to make the same mistakes that I made, and spend as much time figuring out a system.
All you have to do is pay attention to what I’m about to teach you, and you’ll be able to achieve the same results (or even better) as me.
Are you ready to learn how to clean the interior of your car with my “Maximum Impact, Least Effort” method?
If so, read on…
Why should you listen to me?
Before we go deeper into this guide, let me give you a little bit of background information about me.

My name is Alex Draghicescu, and I’m the owner and operator of Clean My Car - The Car Cleaning Service for Successful People.
My clientele ranges from top lawyers, financial advisors, and medical professionals to Fortune 500 CEOs.
What do all these people have in common, you ask?
Good question.
You see, aside from them being the “cream of the crop” in their field, and reaching a financial level where they can afford the most exclusive products and services available, they also share this one important trait (which is common amongst people whom reached this level of success).
They put a high value on their time
Not only do these high achievers barricade and make themselves unavailable to regular people, but they also choose precisely how much time to spend on their daily activities.
Over 80% is delegated further to their assistant, and from then on to various suppliers and service providers.

Naturally, dealing in this high-pressure environment, I had to adapt my service to fit my clients’ style.
So then I came up with a system which enables me to obtain a high quality result, but only in a fraction of the time (and with a fraction off the effort) than other professionals in the car cleaning industry.
And now I’m about to share every single detail of this high-efficiency car cleaning system with you.
All that in a moment.
But first, let me quickly go over some of the reasons why cleaning the interior of your car should be done on a regular basis.
It’s got nothing to do with aesthetics, or making you look bad in front of your friends.
In fact, it’s got everything to do with your health and wellbeing.
Let me explain…
Why is cleaning the interior of your car important?
There are no less than 7 ways your own car is damaging your health right now:
Contaminants you bring into the car yourself (on your clothes, or the bottom of your shoes): pollen, fungus, chemical residue and fallout
Dust Mites and their feces
Plastic material out-gassing
Bacteria and mold from food and spills
Exhaust residue from other vehicles
Micro-fibers from carpet
Your own body’s residue (from perspiration, breathing, coughing and sneezing)
(I wrote all about this in detail here.)
So, given all the different ways your car is affecting your health...
How can you actually protect yourself?
Simple.
By cleaning the interior of your car often.
Tools and Supplies
Before you get started on the actual cleaning, you need to gather up your tools and supplies. (Some you may already have around the house, but for others you will have to make a special trip to the store).
Best of all?
You can do this on a small budget. (You don’t need fancy tools or expensive chemicals to get a quality result.)
So, what tools and supplies do you use to clean the interior of your car?
Here’s what you need for best results:
Wet-dry vacuum (with a minimum of 4-hp motor)
(You want to be able to pull out dirt from deep within the fibers of the carpet and seats. You also want a rugged wet-dry vacuum so you can suck up debris and hard dirt without worrying about it breaking down.)

A strong wet-dry vacuum is a better choice than regular household vacuums
All-purpose cleaning product (non-toxic) – for carpet and plastic
(Contrary to what the automotive industry is telling us, you don’t need a specific cleaning product for every kind of material in the car (except for glass). One caveat: many cleaning products contain harsh chemicals. Read the label carefully.)

Optional: plastic and leather conditioner (protectant)
Glass cleaner (ammonia-free)
(Ammonia is currently used as an ingredient in many cleaning products. It is not safe for you, and you should avoid it when possible.)

Soft-bristle brush – for carpet and plastic
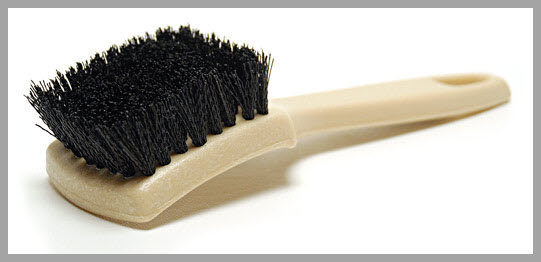
10 quality rags – microfiber towels work best

Gather up all your tools and supplies, and put them in the same place, close to you.

All the tools you need to clean the interior of your car: quality wet-dry vacuum, all-purpose cleaner, non-ammonia glass cleaner, soft-bristle brush, and microfiber towels
Why does this matter?
It makes your life easier if you don’t have to travel back and forth every time you need a different tool, and it also saves you a boatload of time.
Step #1 – Decluttering
This step is of utmost importance.
Do not skip.
You can’t clean what you can’t see, right?
I’ve seen cars look about 50% better after simply getting rid of the stuff laying around. (Plus all the stuff that you bring into your car also acts like a dust magnet.)
The best part?
Getting rid of it also helps the car stay cleaner in the long run.
Remove phone chargers, receipts, change, beverage containers, etc. Nothing remains for now.

Open all the doors and trunk lid so you can have a clear view of the “work area”.
Remember how the goal was to save time and effort?
Bring a trash can handy, so you can dispose of the unwanted stuff.
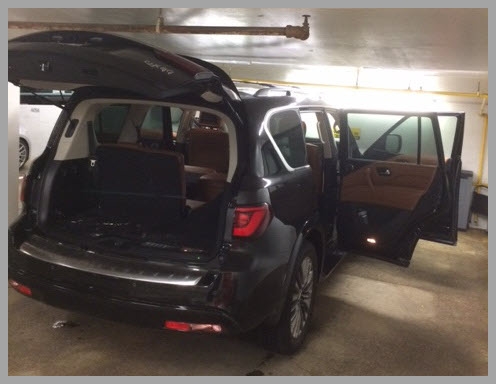
Opening all the doors and trunk lid before you start cleaning makes your job easier
Empty out door pockets, center console, and cupholders. (You'll be amazed at how much junk collects over time).
Take out all personal belongings, and pretty much everything that didn’t come with the car.
Place the ones you’ll reuse close to you, and dispose of everything else. (Be mindful of the environment, and recycle all the cans and plastic, if any.)
Ok, now for the fun part…
Step #2 – Vacuuming
Why are we doing this?
Remember those ugly little creatures - the Dust Mites?

We are removing their main source of food - skin flakes - and give them no reason to stick around.
We want to get rid of them, don’t we?
First thing is to pull out the floor mats and set them aside. You will vacuum and clean them separately.
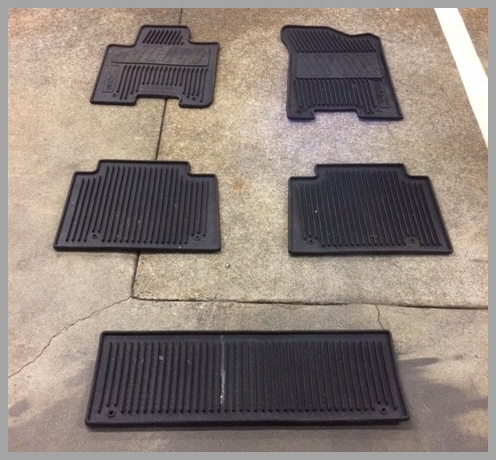
Place the floor mats on the ground so it’s easier to clean them
Pick up by hand all debris too large to fit through the nozzle tip (twigs, pebbles, leaves, etc.) before vacuuming. Throw them away.

Start by vacuuming the driver’s side area first. Always work from the top down and from the inside out.
Why are we doing this?
Because it gives you a starting point and a destination. (This way you do every area only once.)
Using the “crevice” tool attachment of your vacuum cleaner, vacuum the center console, cupholders, driver’s seat and floor area.

Use the narrow “crevice” tool attachment for tight spots
Pro Tip: Using your fingers, gently split open the seams area of your seats, so the vacuum can pick up any crumbs and dirt that has accumulated in there.

Gently splitting the seams with your fingers reveals dirt accumulated in there
Once you’re finished vacuuming the driver’s side area, move on to the next one, in this order: left passenger back, right passenger front and right passenger back.

This ensures that you’re done in the fastest time possible, and also avoids unnecessary steps.
Vacuum the trunk last.
Vacuum the floor mats, and place them back in the car.
Pro Tip: Brush the mats lightly before vacuuming to dislodge any embedded dirt.
Optional – Shampoo the carpet (and floor mats)
I recommend you to do this step only once a year to remove oils and embedded dirt, for which vacuuming alone is not enough.
After vacuuming, spray the floor area with the all-purpose cleaner. Be generous, but do not soak the carpet.
Use the brush to scrub and clean, with a back to forth and side to side motion. Wipe clean with a microfiber towel.

Vacuum again briefly to remove loose dirt.
Lay the floor mats on the ground. Spray them with all-purpose cleaner.
Gently scrub back and forth, and up and down, with the soft-bristle brush. Wipe clean with microfiber towel.

Vacuum again to remove any remaining debris.
Rubber floor mats: spray with cleaner and scrub with brush. Suck up liquid and dirt with shop-vac. Wipe dry with microfiber towel.
Step #3 – Wiping down interior (and glass)
Spray generously a rag with the all-purpose cleaner. Fold it in four. Wring out the excess liquid.
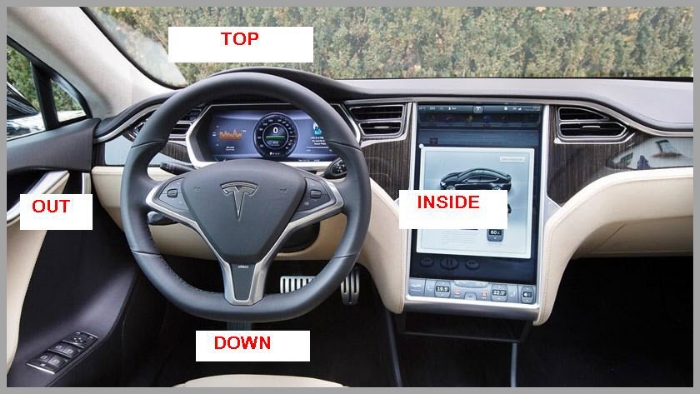
Beginning in the driver’s side area, start wiping surface from the top down, working from the inside out and front to back.
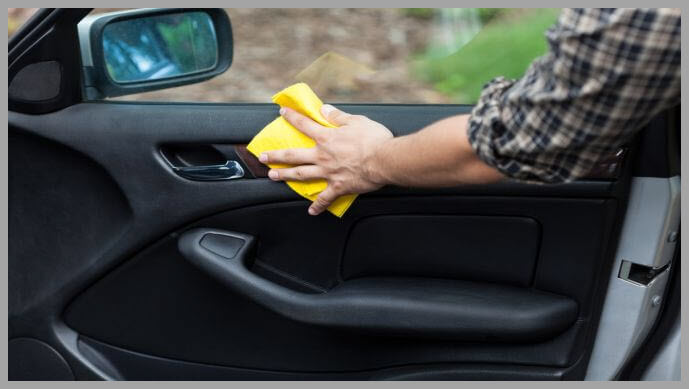
This means you wipe the top of the dashboard first, followed by the gauge area, steering wheel, center console, cupholders and seat, leaving the door panel last.

Always clean from the top down, and from the inside out, for a natural flow
Why not spray the cleaner directly on the dashboard instead?
Because the dashboard has a lot of electronics which are sensitive to liquids. (This way you make sure not to damage anything that may end up with a costly repair.)
No hard scrubbing is necessary, unless your car has not been cleaned in years (in which case you probably need a professional to handle this).
What about stubborn spots, such as a coffee stain?
For such a spot, simply go over a few times, applying slightly more pressure.
Don’t overdo it, or you risk damaging the surface permanently.
Optional - Condition (protect) leather and plastic
This step is not mandatory, unless you live in a sunny area (such as California), when the sun shines year round.
By applying a Leather and Plastic Conditioner on your seats and interior panels you protect these areas from UV-ray exposure (which would have, in time, led to fading and oxidation).
Apply a bit of conditioner on a microfiber towel, and wipe the surface to spread out the product.
Flip the towel, and wipe again to remove any excess product.
Use a microfiber towel to apply protectant to plastic and leather surface
When finished in the driver’s side area, move on to the next area, following the same strategy (top-down, inside-out and front to back motions).
Pro Tip: to remove shoe marks from light coloured door panels and sills, use a Magic Eraser. Spray the Magic Erase with all-purpose cleaner, and lightly rub the area a few times. Wipe clean with microfiber towel.

Shoe marks on light coloured door panel
For glass, spray the glass cleaner onto a towel and wipe the glass surface. Flip the towel to the dry side, and wipe again.

When cleaning the glass, spray the cleaner onto the towel (not the glass) for best results
Conclusion
That’s it, you’re all done.
When properly executed, on a regularly maintained car, this interior cleaning should take under an hour.
The dirtier the car, or the larger (SUV?), the more time and effort you have to put in.
Download Your FREE $100 Car Cleaning Gift Card [click here]
Do you have any tips to make cleaning the interior of your car even easier? If so, share in the comments below.
You will also love reading: